


Spring has officially SPRUNG, you guys! I am so excited—I love this time of year because it is all about growth and preparation. A few of my favorite things! In order to get the most out of the months ahead, it’s best to start early, sowing the seeds for a joyful spring and relaxing summer. We’re prepping all our outdoor spaces, and even worked with a client to rebuild their front yard with fresh sod.
Why Sod?
Curb appeal is about so much more than just aesthetics. It’s a point of pride, a matter of taking care of that special space where we live our lives. A beautiful front yard creates balance between the internal and the external, reflecting the care and joy that take place inside the home. There’s no better feeling than coming home to a beautiful space, inside and out!
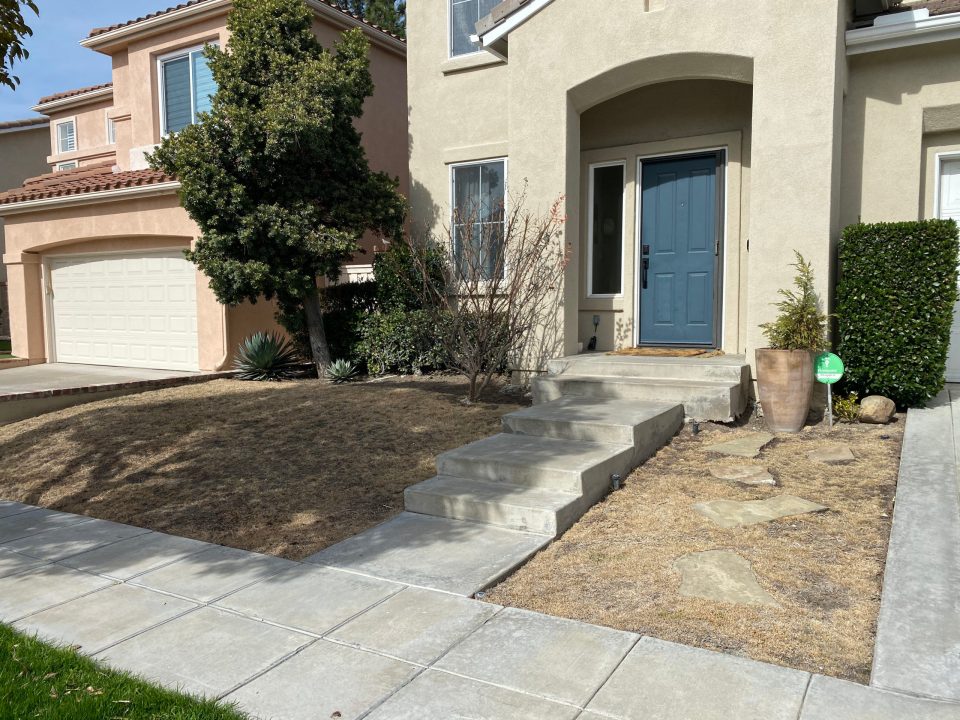
The impacts of a well-kept home are far-reaching, and when our environment meets our needs we are able to be healthier, happier people. A fresh lawn is inviting—it calls for cartwheels on sunny afternoons! Inversely, when your yard is patchy or bare, it can create a drag before you even walk in the door.
While lots of folks are switching to turf, I still love the feel of fresh, live grass. Even the smell is intoxicating! And keeping up a yard has so much to teach us about caring for the land where we live. Spending a weekend outside in the dirt is a total mood-booster: the smell of soil and freshly cut grass releases serotonin, leaving us happier and healthier after a good gardening day.
Sod is easily the best way to get gorgeous, green lawns. While seeding your yard can take years and come out patchy as the growing grass competes with weeds and soil erosion, sod offers instant, healthy results that last for years. When planning a summer yard worth frolicking in, it’s definitely best to go with sod in the Spring!
How to Sod It Yourself
Step 1: Take Measurements
Measure the area where you want to add sod and test your soil’s PH. Well aerated soil has a PH of 6 – 7.5. If your PH is way off, your sod might not take, so you can amend the soil with sulfate or limestone to get it just-right.

Step 2: Till the Land
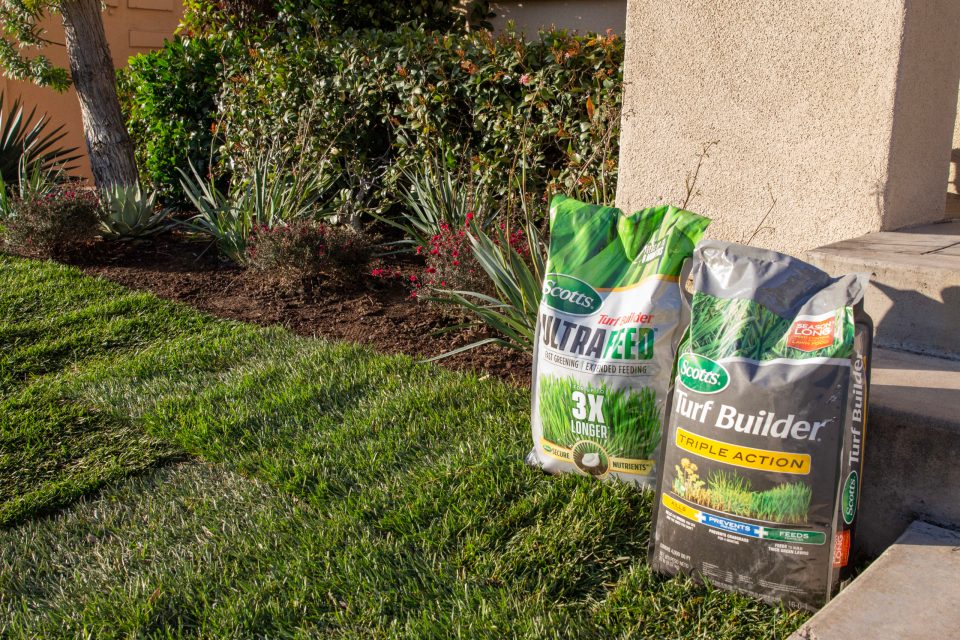
Using a rototiller (you can rent one from Home Depot), loosen the soil to a depth of 6-8 inches, and mix in about 2-3 inches of fertilizer, along with any PH correctors at this time to improve water retention. We used Scotts Triple Action Turf Builder and Ultrafeed to help prevent weeds and keep the fresh grass looking lush.
Step 3: Level the Playing Field
Once your soil has been perfected, make sure the area is as level as possible. This will prevent water pooling in certain areas of your lawn. This front yard has a bit of a slope, but we did our best to make sure the area was nice and flat. Before adding sod, the ground should sit an inch below curbs or nearby pavement so the grass will be even with these entry points.
Step 4: Add Water!
Water the soil thoroughly, and give it some time to sink in overnight. This is a multi-day process!
Step 5: Lay the Sod
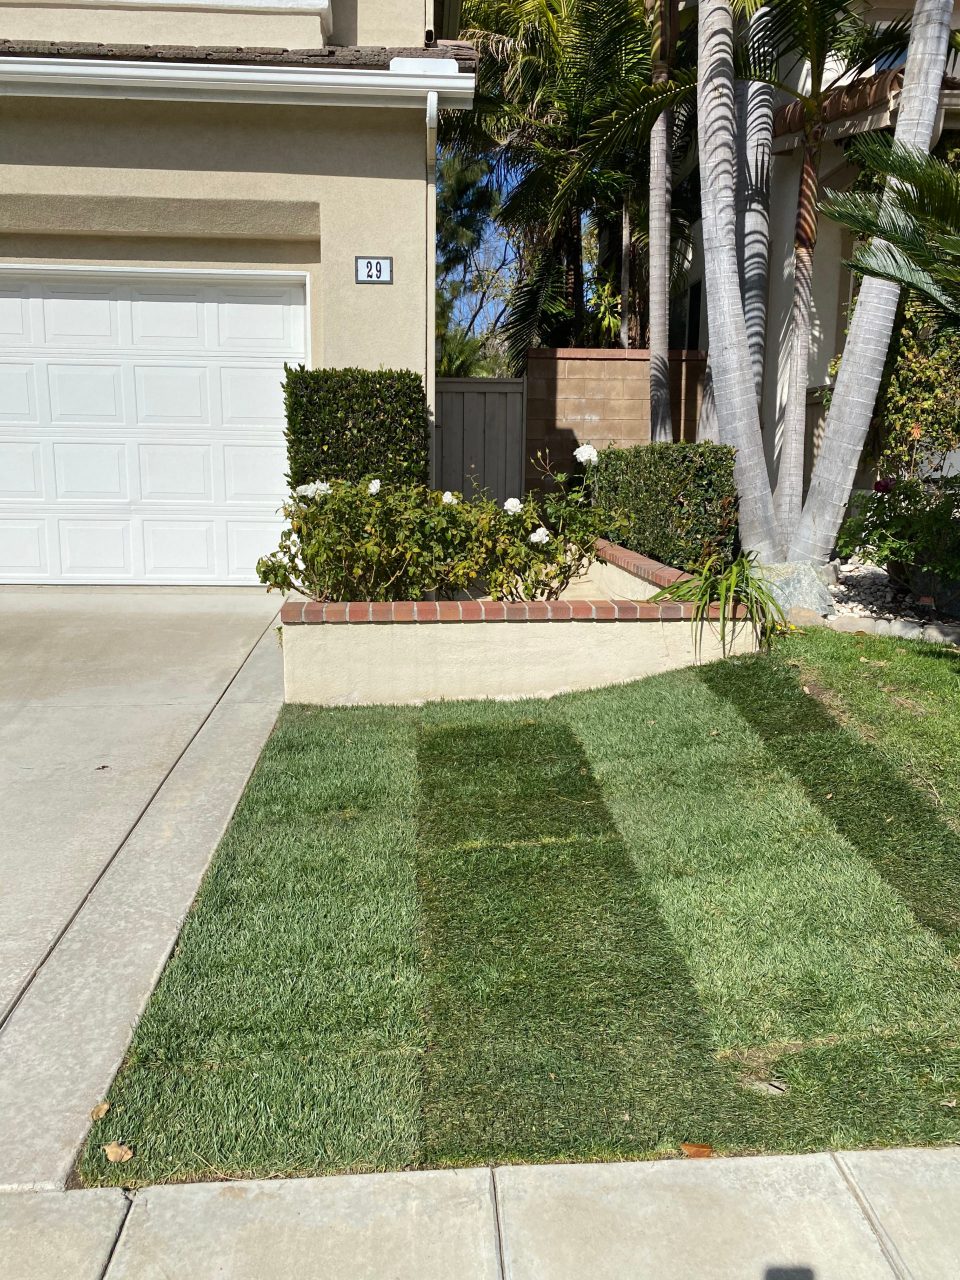
It’s Day 2, and time to lay your turf! Sod is a lot like tile, actually—you want to stagger your squares of sod in each row for a more seamless end-result. To do this, just cut the first square of the next row in half! Sod is easy to cut with a lawn edger, so you can get around sprinkler heads or, in our case, to accommodate the pavers already in this lawn.
Step 6: Trim the Edges
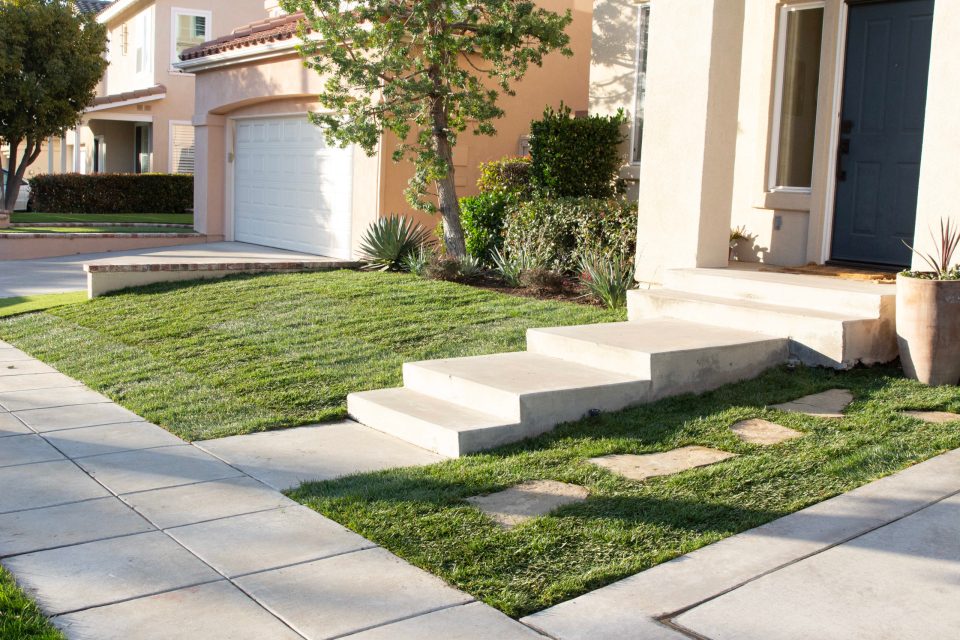
Keep all the edges close together and flat, with no overlap, ensuring no soil is exposed. It’s best to get a little extra sod to patch any holes. Then fill in the seams with top soil—kinda like grout! Make sure it’s nice and even, without lifting up the edges of the sod. Finally, Use a lawn roller to push the grass roots into the soil.
Get Ready for Green Grass & Blue Skies
Congratulations! You just laid your own lawn! Over the next few weeks, water the fresh grass daily (as drought conditions and water conservation laws permit!) and wait at least two weeks before mowing. The next steps? Tackle a planter box, or add some perennials to a pot by the door for a truly Spring-worthy look.
Happy Day!
Anita


+ show Comments
- Hide Comments
add a comment